> For the complete documentation index, see [llms.txt](https://support.dlink.com.sg/llms.txt). Markdown versions of documentation pages are available by appending `.md` to page URLs; this page is available as [Markdown](https://support.dlink.com.sg/consumer/aquila-pro-ai-wi-fi-6-router/m30/faqs/how-to-set-up-m30-using-its-webgui.md).
# How to set up M30 using its webGUI
{% stepper %}
{% step %}
Connect your computer or device to one of the router’s LAN ports using another ethernet\
cable or via Wi-Fi (By default, Password located on the label sticker at the back of the\
router)
{% endstep %}
{% step %}
If this is your first time installing the router, open your web browser and enter\
into the browser (xxxx represents the last 4 digits of the\
MAC address) or . Enter the Admin Password and click login to\
start the configuration process.
The web address and default admin password are printed on the device label at the bottom of the device.
NOTE: If you have changed the password and cannot remember it, you will need to reset the\ router to factory defaults.
{% endstep %}
{% step %}
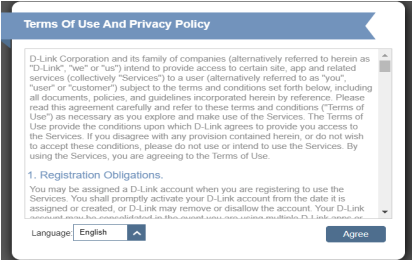
### Agree to the Terms of Use and Privacy Policy before proceeding.
{% endstep %}
{% step %}
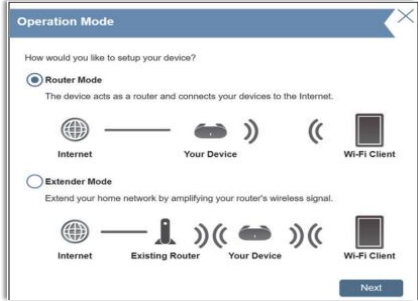
You will be prompted with the Operation Mode page to set up the mode of your router.\
Select **Router Mode** to configure M30 as a standalone router. Select **Extender Mode** to\
configure M30 as a extender. Click **Next** to continue
{% endstep %}
{% step %}
Connect the router and the modem with an Ethernet cable. Click **I understand and**\
**want to continue**
{% endstep %}
{% step %}
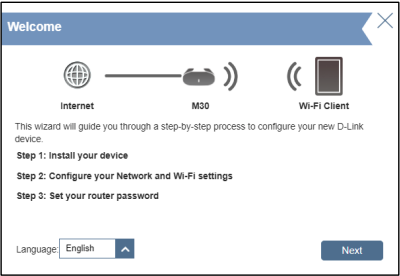
### Click Next
{% endstep %}
{% step %}
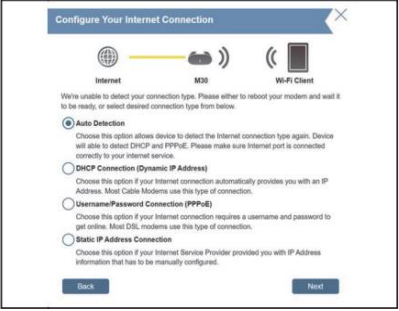
If the router does not automatically detect a valid Internet connection, a list of\
connections will be displayed where you can manually select your Internet connection\
type (this information can be obtained from your Internet Service Provider).
Click **Next** to continue.
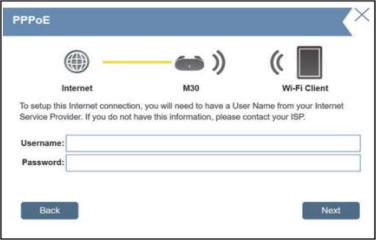
If the router detected a PPPoE connection type or it is selected manually (from the list),\
enter your PPPoE username and password. If you do not have this information, please\
contact your ISP.
NOTE: Make sure to remove all other existing PPPoE software from your computer. The software is no longer needed and will not work through a router.
Click **Next** to continue.
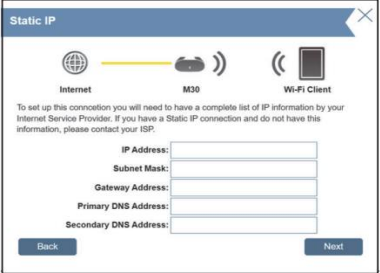
If the router detected a Static connection type or it is manually selected, enter the **IP**\
**Address, Subnet Mask, Gateway Address**, and **Primary and Secondary DNS**\
settings supplied by your ISP. If you do not have this information, please contact your\
ISP
Click **Next** to continue.
If the router detected a **DHCP** connection type, the wizard will proceed to the Wi-Fi\
Setup page. Enter a **Wi-Fi Network Name** and **Wi-Fi Password** to setup your Wi-Fi\
network. Click **Next** to continue.
{% endstep %}
{% step %}
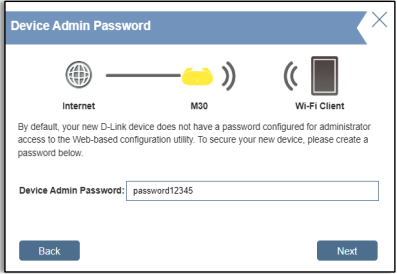
To better protect the router's configuration, please create an admin password. You will\
be prompted for this password every time you want to use the router’s web configuration\
utility.
Click **Next** to continue.
NOTE: It is strongly recommended that you change the default admin password.
{% endstep %}
{% step %}
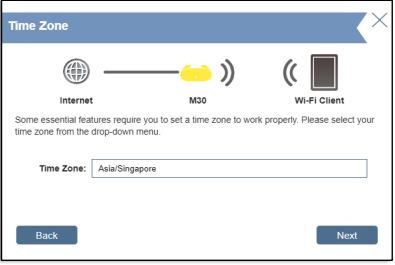
### Select your time zone from the drop-down menu. Click Next to continue.
{% endstep %}
{% step %}
Choose whether to keep your device up-to-date automatically or to manage the device\
updates by yourself.
Click **Next** to continue.
NOTE: Keeping your router's firmware up to date can ensure you're always getting the latest\ security update and new features over the air for your device.
{% endstep %}
{% step %}
You will be presented with a summary of your settings. Click **Next** to finalize the settings\
or **Back** to make changes
{% endstep %}
{% step %}
Please wait until the device settings are saved. Do not turn off or unplug your router\
during this time.
{% endstep %}
{% step %}
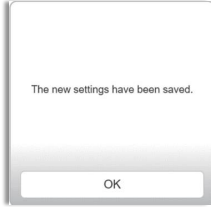
Your new settings have been saved and your router is now configured. Click **OK** to close\
the Setup Wizard.
{% endstep %}
{% step %}
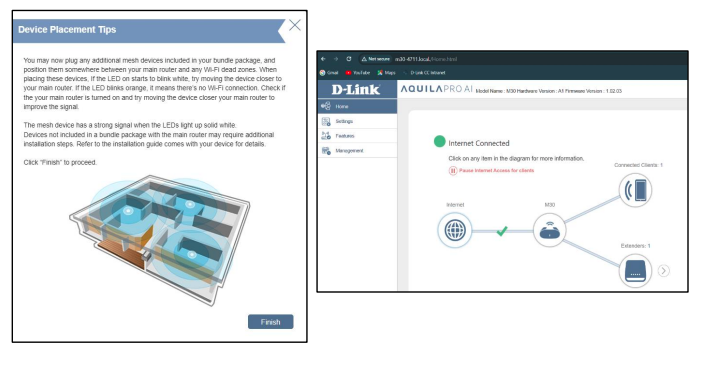
Power on the second M30 and wait for it to boot up (the LED will turn blinking orange to\
solid white). verify your connection by connecting to your D-Link router to confirm if Wi-Fi\
is working or use devices to connect to your Wi-Fi network.
{% endstep %}
{% endstepper %}